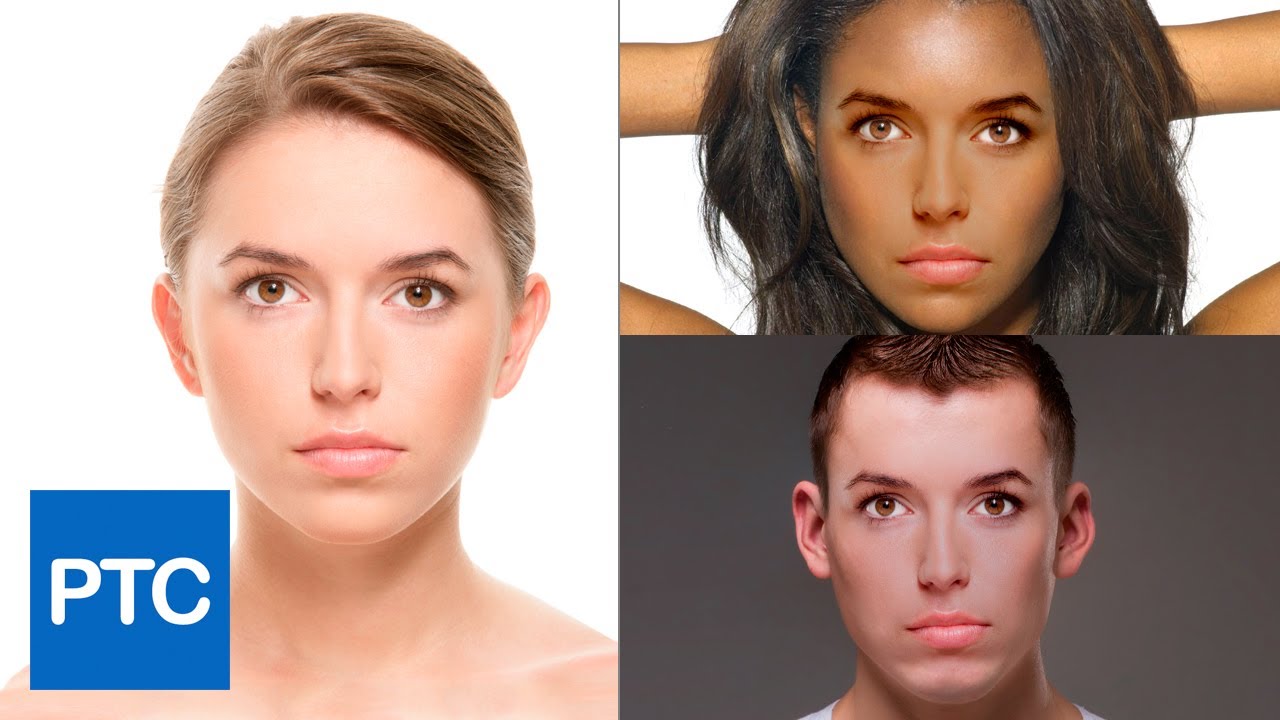
How to Swap Faces in Photoshop - Best swap heads in photoshop
The Photoshop face swap is an image-editing technique that permits you to essentially swap faces of various people using Photoshop. The Photoshop face swap technique is particularly useful for ecommerce brands who want to form the foremost of their product photography investments.
There are many reasons you’d want to try to to a Photoshop face swap, including:
Adding variety to the models featured in your product photos (remember, consumers wish to see people that appear as if them)
Using a shot where everything but the model’s face was within the right position
Making an unhappy or angry child happy again
In this article, we’ll learn the Photoshop face swap and blend technique in only 10 easy steps.
Receive free ecommerce & product photography tips
Email address
SUBSCRIBE
Editor’s note: We’re using Photoshop 2018 Creative Cloud. For other versions, the steps may vary.
images.google.de/url?sa=t&url=https%3A%2F%2Fcloudretouch.com/photo-retouching-service-companies/%2F
images.google.fr/url?sa=t&url=https%3A%2F%2Fcloudretouch.com/photo-retouching-service-companies/%2F
maps.google.fr/url?sa=t&url=https%3A%2F%2Fcloudretouch.com/photo-retouching-service-companies/%2F
maps.google.es/url?sa=t&url=https%3A%2F%2Fcloudretouch.com/photo-retouching-service-companies/%2F
images.google.es/url?sa=t&url=https%3A%2F%2Fcloudretouch.com/photo-retouching-service-companies/%2F
Step 1: Open your image files in Photoshop
Open the 2 headshots in Photoshop by clicking File and selecting Open from the dropdown menu. It’ll open a replacement window where you'll select the photos.
Open image files in Photoshop
You can select both by holding the CTRL key (COMMAND on a Mac) while you click the second file.
select both images by holding the CTRL key
maps.google.jo/url?q=https%3A%2F%2Fcloudretouch.com/photo-retouching-service-companies/%2F%2F
google.jo/url?q=https%3A%2F%2Fcloudretouch.com/photo-retouching-service-companies/%2F%2F
images.google.com.kh/url?q=https%3A%2F%2Fcloudretouch.com/photo-retouching-service-companies/%2F%2F
maps.google.com.kh/url?q=https%3A%2F%2Fcloudretouch.com/photo-retouching-service-companies/%2F%2F
google.com.kh/url?q=https%3A%2F%2Fcloudretouch.com/photo-retouching-service-companies/%2F%2F
maps.google.mu/url?q=https%3A%2F%2Fcloudretouch.com/photo-retouching-service-companies/%2F%2F
images.google.mu/url?q=https%3A%2F%2Fcloudretouch.com/photo-retouching-service-companies/%2F%2F
google.mu/url?q=https%3A%2F%2Fcloudretouch.com/photo-retouching-service-companies/%2F%2F
images.google.com.af/url?q=https%3A%2F%2Fcloudretouch.com/photo-retouching-service-companies/%2F%2F
images.google.com.mt/url?q=https%3A%2F%2Fcloudretouch.com/photo-retouching-service-companies/%2F%2F
maps.google.com.mt/url?q=https%3A%2F%2Fcloudretouch.com/photo-retouching-service-companies/%2F%2F
maps.google.com.jm/url?q=https%3A%2F%2Fcloudretouch.com/photo-retouching-service-companies/%2F%2F
images.google.com.jm/url?q=https%3A%2F%2Fcloudretouch.com/photo-retouching-service-companies/%2F%2F
google.com.jm/url?q=https%3A%2F%2Fcloudretouch.com/photo-retouching-service-companies/%2F%2F
maps.google.as/url?q=https%3A%2F%2Fcloudretouch.com/photo-retouching-service-companies/%2F%2F
maps.google.iq/url?q=https%3A%2F%2Fcloudretouch.com/photo-retouching-service-companies/%2F%2F
images.google.iq/url?q=https%3A%2F%2Fcloudretouch.com/photo-retouching-service-companies/%2F%2F
google.iq/url?q=https%3A%2F%2Fcloudretouch.com/photo-retouching-service-companies/%2F%2F
maps.google.ad/url?q=https%3A%2F%2Fcloudretouch.com/photo-retouching-service-companies/%2F%2F
images.google.ad/url?q=https%3A%2F%2Fcloudretouch.com/photo-retouching-service-companies/%2F%2F
Step 2: Select the face you would like in your final photo
Click on the file tab that corresponds to the face that you simply want within the final photo. Select the Lasso Tool by pressing L on the keyboard or selecting it from the tool menu. Carefully trace round the eyebrows, nose and lips.
lasso tool in photoshop
It’s best to pick only the foremost highlighted portions of the face in order that you'll swap faces with a more realistic outcome. It’ll have a flashing line around it when you’re finished.
highlighted portions of the face
Step 3: Copy the image
Click CTRL+C (or COMMAND+C for Mac users) to repeat the choice . confirm the line remains flashing.
Step 4: Paste the image
From the tabbed workspaces, select your workspace that contains the face from your original shot that you simply want to exchange . this may be your “body” layer. Press CTRL+V (COMMAND+V on Mac) to stick the copied face to the photo. Then press CTRL+D (COMMAND+D for Mac users) to deselect the face and take away the flashing line.
Paste the image
Step 5: Resize the image
Adjust the layer to 30% opacity in order that you'll see beneath the layer. Using CTRL+T (COMMAND+T for Mac), position the face by lining up the eyes and mouth, stretching as required to urge them to line up as closely as you'll .
Resize the image
To adjust the face proportionately hold the Shift key and click on the box and drag. If you hover near the corner, it'll offer you rotation toggles that allow you to show the image.
hold the Shift key and click on the box and drag
Getting the faces to line up well would require some patience, and a touch trial and error using your eye to seek out the position that appears most natural.
Once you’re proud of the location , press Enter to finalize your placement. this is often really important. If you forget to press Enter once you finish, all of your diligence are going to be lost.
Then adjust the layer opacity back to 100%.
Step 6: Copy your background layer
Next, you’ll got to duplicate your background layer. From the layer menu select your background layer. you'll right click and choose Duplicate Layer or use the keyboard shortcut by pressing CTRL+J (COMMAND+J on Mac).
Rename the copy layer “body” because it will structure the bulk of your final photo. plow ahead and click on on the Visibility Eye to cover the background layer.
Copy your background layer
Step 7: Create a clipping mask
Press CTRL (COMMAND on Mac) while clicking the thumbnail of the face layer. this may select the form of the face on all layers.
maps.google.cl/url?sa=t&url=https%3A%2F%2Fcloudretouch.com/photo-retouching-service-companies/%2F
maps.google.ie/url?sa=t&url=https%3A%2F%2Fcloudretouch.com/photo-retouching-service-companies/%2F
images.google.ie/url?sa=t&url=https%3A%2F%2Fcloudretouch.com/photo-retouching-service-companies/%2F
images.google.sk/url?sa=t&url=https%3A%2F%2Fcloudretouch.com/photo-retouching-service-companies/%2F
images.google.bg/url?sa=t&url=https%3A%2F%2Fcloudretouch.com/photo-retouching-service-companies/%2F
maps.google.bg/url?sa=t&url=https%3A%2F%2Fcloudretouch.com/photo-retouching-service-companies/%2F
images.google.com.pe/url?sa=t&url=https%3A%2F%2Fcloudretouch.com/photo-retouching-service-companies/%2F
maps.google.com.co/url?sa=t&url=https%3A%2F%2Fcloudretouch.com/photo-retouching-service-companies/%2F
images.google.com.sa/url?sa=t&url=https%3A%2F%2Fcloudretouch.com/photo-retouching-service-companies/%2F
maps.google.com.sa/url?sa=t&url=https%3A%2F%2Fcloudretouch.com/photo-retouching-service-companies/%2F
images.google.hr/url?sa=t&url=https%3A%2F%2Fcloudretouch.com/photo-retouching-service-companies/%2F
maps.google.hr/url?sa=t&url=https%3A%2F%2Fcloudretouch.com/photo-retouching-service-companies/%2F
maps.google.co.ve/url?sa=t&url=https%3A%2F%2Fcloudretouch.com/photo-retouching-service-companies/%2F
images.google.co.ve/url?sa=t&url=https%3A%2F%2Fcloudretouch.com/photo-retouching-service-companies/%2F
maps.google.ee/url?sa=t&url=https%3A%2F%2Fcloudretouch.com/photo-retouching-service-companies/%2F
Create a clipping mask
Select the body layer and click on on the Visibility Eye of the face layer to cover it. After the background and face layer are hidden you'll only see the layer you've got selected.
Step 8: Create a small overlap of the face with the body
Go to the Photoshop menu within the header and click on Select. Then choose Modify and choose Contract.
Create a small overlap of the face with the body
In the dialogue box, type 10 pixels. this may shrink the clipping mask by 10 pixels which can allow the face to overlap the body by a couple of pixels.
In the dialogue box, type 10 pixels
Step 9: Delete the face from the body layer
While the body layer remains selected, press Delete or Backspace to get rid of the world beneath the face. Press CTRL+D (COMMAND+D on Mac) to deselect.
press Delete or Backspace to get rid of the world beneath the face
Step 10: Select the body and face layers
Go to Edit within the Photoshop menu. Select Auto-Blend Layers from the dropdown menu.
Select the body and face layers
A box will crop up (see screenshot below). Select Panorama and check the box for Seamless Tones and colours and Content Aware Fill Transparent Areas before clicking OK.
Select Panorama and check the box for Seamless Tones and colours and Content Aware Fill Transparent Areas before clicking OK
Here’s what you’ll be looking at:
image after blending
And your final image should like this:
final image with swapped face
How does one Change complexion in Photoshop?
There are several techniques you'll use to vary complexion in Photoshop. We recommend first using the auto-blend function and selecting the naturally highlighted areas of the face. This makes the blending look more natural even in cases where the tones might not match perfectly.
If you would like to vary the complexion for your Photoshop face swap, rather than following Step 10 within the tutorial, you'll also try one among the following:
Assess the difference in brightness and color of the 2 images. Then using Hue, Saturation, Brightness and a Layer Mask you'll adjust all independently until you achieve the specified tone.
Another option is to use the Selective Color Mask. this system uses a layer mask to guard the areas that don't need color adjustment. It alters the CMYK and RGB colors of the layers until they match.
A third method is to use the Curves function with a Layer Mask to guard areas that don't need color adjustment.
What Is the Layer Mask in Photoshop?
You use a Layer Mask in Photoshop to pick only parts of a picture . The Layer Mask hides portions of your photo from being seen. That’s why it’s helpful within the Photoshop face swap: It preserves parts of the first face while replacing other parts of the face with a special one.
Photoshop automatically creates the Layer Mask as a function of the Auto-Blend feature.
The Layer Mask uses black and white to denote areas of exposure. The white areas are exposed and therefore the black areas aren't . Additionally, you'll use the Paintbrush tool to use white or black to the image for better precision.
There are other uses for the Layer Mask, like removing a component or object from a picture or superimposing multiple images together.
Using the Photoshop Face Swap Technique in Product Photos
The Photoshop face swap technique are often applied to other scenarios, quite just switching faces. For ecommerce product photography especially , the Photoshop face swap features a few potential uses. this suggests you'll more easily get varied product photos for a smaller investment.
For example:
For jewelry product photography, you'll swap out stones, pendants or gems
In apparel, you'll switch the designs on a t-shirt
swap t-shirt design
When you have lifestyle photos with models, you'll use the Photoshop face swap to vary their hairstyles
You can change the graphic on a mug or pint glass
Change the labels on drink bottles, cardboard boxes of food, and other food-related items
Change the labels on drink bottles
Don’t have time to try to to it all yourself? we will apply the Photoshop face swap technique to your product photos for you.
For More Details link here:
maps.google.lt/url?sa=t&url=https%3A%2F%2Fimageworkindia.com
images.google.com.sa/url?sa=t&url=https%3A%2F%2Fimageworkindia.com
maps.google.com.sa/url?sa=t&url=https%3A%2F%2Fimageworkindia.com
google.com.sa/url?sa=t&url=https%3A%2F%2Fimageworkindia.com
images.google.hr/url?sa=t&url=https%3A%2F%2Fimageworkindia.com
google.hr/url?sa=t&url=https%3A%2F%2Fimageworkindia.com
maps.google.hr/url?sa=t&url=https%3A%2F%2Fimageworkindia.com
google.co.ve/url?sa=t&url=https%3A%2F%2Fimageworkindia.com
maps.google.co.ve/url?sa=t&url=https%3A%2F%2Fimageworkindia.com
images.google.co.ve/url?sa=t&url=https%3A%2F%2Fimageworkindia.com
google.ee/url?sa=t&url=https%3A%2F%2Fimageworkindia.com
maps.google.ee/url?sa=t&url=https%3A%2F%2Fimageworkindia.com
images.google.ee/url?sa=t&url=https%3A%2F%2Fimageworkindia.com
google.com.pk/url?sa=t&url=https%3A%2F%2Fimageworkindia.com
images.google.com.pk/url?sa=t&url=https%3A%2F%2Fimageworkindia.com
google.rs/url?sa=t&url=https%3A%2F%2Fimageworkindia.com
maps.google.rs/url?sa=t&url=https%3A%2F%2Fimageworkindia.com
images.google.rs/url?sa=t&url=https%3A%2F%2Fimageworkindia.com
google.si/url?sa=t&url=https%3A%2F%2Fimageworkindia.com
maps.google.si/url?sa=t&url=https%3A%2F%2Fimageworkindia.com
images.google.si/url?sa=t&url=https%3A%2F%2Fimageworkindia.com
images.google.by/url?sa=t&url=https%3A%2F%2Fimageworkindia.com
google.by/url?sa=t&url=https%3A%2F%2Fimageworkindia.com
maps.google.by/url?sa=t&url=https%3A%2F%2Fimageworkindia.com
images.google.co.ma/url?q=httpss%3A%2F%2Fimageworkindia.com%2F
images.google.com.ec/url?sa=t&url=https%3A%2F%2Fimageworkindia.com
google.com.ec/url?sa=t&url=https%3A%2F%2Fimageworkindia.com
maps.google.com.ec/url?sa=t&url=https%3A%2F%2Fimageworkindia.com
maps.google.lv/url?sa=t&url=https%3A%2F%2Fimageworkindia.com
google.lv/url?sa=t&url=https%3A%2F%2Fimageworkindia.com
images.google.lv/url?sa=t&url=https%3A%2F%2Fimageworkindia.com
images.google.com.cu/url?q=httpss%3A%2F%2Fimageworkindia.com%2F
maps.google.com.cu/url?q=httpss%3A%2F%2Fimageworkindia.com%2F
images.google.com.pr/url?sa=t&url=https%3A%2F%2Fimageworkindia.com
maps.google.com.pr/url?sa=t&url=https%3A%2F%2Fimageworkindia.com
google.com.pr/url?sa=t&url=https%3A%2F%2Fimageworkindia.com
images.google.com.gt/url?sa=t&url=https%3A%2F%2Fimageworkindia.com
google.com.gt/url?sa=t&url=https%3A%2F%2Fimageworkindia.com
maps.google.com.gt/url?sa=t&url=https%3A%2F%2Fimageworkindia.com
images.google.co.cr/url?sa=t&url=https%3A%2F%2Fimageworkindia.com
google.co.cr/url?sa=t&url=https%3A%2F%2Fimageworkindia.com
maps.google.co.cr/url?sa=t&url=https%3A%2F%2Fimageworkindia.com
google.com.uy/url?sa=t&url=https%3A%2F%2Fimageworkindia.com
images.google.com.uy/url?sa=t&url=https%3A%2F%2Fimageworkindia.com
maps.google.com.uy/url?sa=t&url=https%3A%2F%2Fimageworkindia.com
maps.google.lu/url?sa=t&url=https%3A%2F%2Fimageworkindia.com
images.google.lu/url?sa=t&url=https%3A%2F%2Fimageworkindia.com
google.lu/url?sa=t&url=https%3A%2F%2Fimageworkindia.com
maps.google.co.ke/url?sa=t&url=https%3A%2F%2Fimageworkindia.com
google.co.ke/url?sa=t&url=https%3A%2F%2Fimageworkindia.com
images.google.co.ke/url?sa=t&url=https%3A%2F%2Fimageworkindia.com
images.google.com.do/url?sa=t&url=https%3A%2F%2Fimageworkindia.com
maps.google.com.do/url?sa=t&url=https%3A%2F%2Fimageworkindia.com
google.com.do/url?sa=t&url=https%3A%2F%2Fimageworkindia.com
google.co.ma/url?sa=t&url=https%3A%2F%2Fimageworkindia.com
images.google.co.ma/url?sa=t&url=https%3A%2F%2Fimageworkindia.com
maps.google.lk/url?sa=t&url=https%3A%2F%2Fimageworkindia.com
google.lk/url?sa=t&url=https%3A%2F%2Fimageworkindia.com
images.google.lk/url?sa=t&url=https%3A%2F%2Fimageworkindia.com
images.google.com.cu/url?sa=t&url=https%3A%2F%2Fimageworkindia.com
google.com.cu/url?sa=t&url=https%3A%2F%2Fimageworkindia.com
maps.google.com.cu/url?sa=t&url=https%3A%2F%2Fimageworkindia.com
images.google.co.bw/url?sa=t&url=https%3A%2F%2Fimageworkindia.com
google.co.bw/url?sa=t&url=https%3A%2F%2Fimageworkindia.com
maps.google.co.bw/url?sa=t&url=https%3A%2F%2Fimageworkindia.com
images.google.co.uk/url?sa=t&url=httpss%3A%2F%2Fimageworkindia.com
maps.google.co.uk/url?sa=t&url=httpss%3A%2F%2Fimageworkindia.com
maps.google.fr/url?sa=t&url=httpss%3A%2F%2Fimageworkindia.com
images.google.it/url?sa=t&url=httpss%3A%2F%2Fimageworkindia.com
maps.google.com.br/url?sa=t&url=httpss%3A%2F%2Fimageworkindia.com%2F
images.google.co.in/url?sa=t&url=httpss%3A%2F%2Fimageworkindia.com
images.google.ru/url?sa=t&url=httpss%3A%2F%2Fimageworkindia.com
images.google.com/url?sa=t&url=https%3A%2F%2Fimageworkindia.com
maps.google.com.mx/url?sa=t&url=httpss%3A%2F%2Fimageworkindia.com
images.google.dk/url?sa=t&url=httpss%3A%2F%2Fimageworkindia.com
maps.google.dk/url?sa=t&url=httpss%3A%2F%2Fimageworkindia.com
maps.google.fi/url?sa=t&url=httpss%3A%2F%2Fimageworkindia.com
images.google.com.vn/url?sa=t&url=httpss%3A%2F%2Fimageworkindia.com
maps.google.pt/url?sa=t&url=httpss%3A%2F%2Fimageworkindia.com
images.google.pt/url?sa=t&url=httpss%3A%2F%2Fimageworkindia.com
images.google.co.za/url?sa=t&url=httpss%3A%2F%2Fimageworkindia.com
maps.google.co.za/url?sa=t&url=httpss%3A%2F%2Fimageworkindia.com
images.google.com.sg/url?sa=t&url=httpss%3A%2F%2Fimageworkindia.com
images.google.co.il/url?sa=t&url=httpss%3A%2F%2Fimageworkindia.com
images.google.cl/url?sa=t&url=httpss%3A%2F%2Fimageworkindia.com
maps.google.ie/url?sa=t&url=httpss%3A%2F%2Fimageworkindia.com
images.google.bg/url?sa=t&url=httpss%3A%2F%2Fimageworkindia.com
maps.google.bg/url?sa=t&url=httpss%3A%2F%2Fimageworkindia.com
images.google.com.pe/url?sa=t&url=httpss%3A%2F%2Fimageworkindia.com
images.google.com.sa/url?sa=t&url=httpss%3A%2F%2Fimageworkindia.com
maps.google.com.sa/url?sa=t&url=httpss%3A%2F%2Fimageworkindia.com
images.google.hr/url?sa=t&url=httpss%3A%2F%2Fimageworkindia.com
maps.google.hr/url?sa=t&url=httpss%3A%2F%2Fimageworkindia.com
images.google.com.ec/url?sa=t&url=httpss%3A%2F%2Fimageworkindia.com
maps.google.com.do/url?sa=t&url=httpss%3A%2F%2Fimageworkindia.com
https://bit.ly/3aHbbJc
https://cutt.ly/Rv5oYby
https://t.co/DLzah1iU3N?amp=1
https://t.co/7yXvwsAlRg?amp=1
https://t.co/0X1Py0YBVt?amp=1
https://t.co/S5X6OmIoFq?amp=1
https://t.co/EIMkyiSCnu?amp=1
https://t.co/so5DhLATgx?amp=1
https://t.co/FZdB8LTWSJ?amp=1
https://t.co/QMq8zgdRY4?amp=1
No comments:
Post a Comment